

There are a lot of maintenance and repair operations on a car that most vehicle owners should not attempt to do themselves. Checking the oil is not one of them. It might be a good idea to pass on changing the oil if you are not mechanically inclined, and you should probably reconsider replacing your brake pads yourself, but there is no harm in checking your engine’s oil. In fact, it is a quick and simple process, and you should do it regularly.
Why do you need to check the oil?
Motor oil lubricates the moving parts inside your engine. Without sufficient lubrication, your engine would seize and see an early demise. So, it is essential that there is plenty of the right type of oil in your engine at all times.
You might ask, “My car comes equipped with an oil life monitor. Doesn’t that tell me when it is time to change the oil?” Well, yes. But it does not tell you the whole story.
Over time, motor oil breaks down from heat and stress. That is why it is necessary to change it frequently. As a convenient reminder, vehicle manufacturers began including an oil life monitoring system to alert you that it is time for your next oil change service. Depending on the make and model of your car, that could be anywhere from every 5K to 10K miles or more. Sometimes less if you drive in what they consider “special” or “severe” conditions.
But in between those oil changes, your car can lose oil. Sometimes that is due to an oil leak. But even a perfectly good engine can burn or lose oil. If truth be told, some manufacturers suggest that their engines will lose up to a quart of oil every thousand miles or so! While that sounds ridiculous, it is, unfortunately, not uncommon with modern motors. It is expected.
If your engine gets low on oil, the oil warning light could show up on your dashboard display to tell you that the oil pressure has dropped. By that time, engine damage could already be occurring from low oil pressure and an insufficient amount of oil.
Therefore, no matter how conscientious you may be about on time oil changes for your car, there is a fairly high likelihood that you would need to top off your oil in the meantime.
So, how do you check your engine oil?
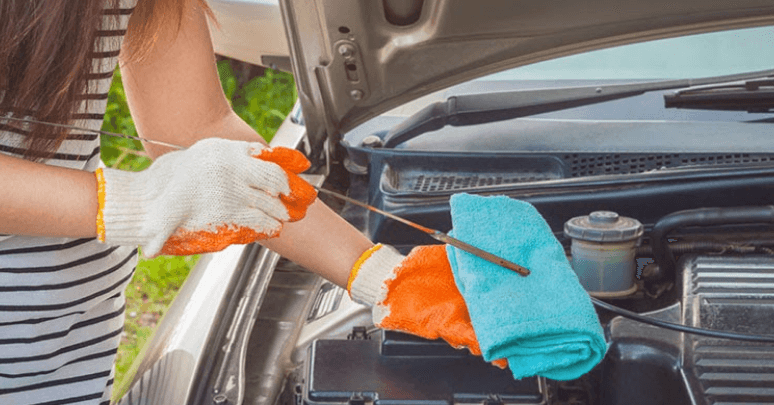
To make sure there is always plenty of oil in your engine, check the level every couple of weeks or at least monthly. The process is pretty easy. All it involves is opening up the hood and removing a dipstick to discern what your engine oil is trying to tell you. It can be done in as few as five steps.
Before you begin, there are a few items that you will want to prepare. First, if you are not familiar with what’s under the hood, consider reading your vehicle owner’s manual where you will find a detailed description of where the dipstick is located. Next, get a lint-free cloth to wipe off residue from the dipstick. Finally, warm up your engine for a few minutes (a good time to check the oil is right after you return from a short trip to the market or when you stop at a station for gas). Turn the engine off before you open the hood and check the oil.
From there, follow these five steps:
1. Open the hood
You do so by pulling the hood release handle. The release is usually found either underneath the dashboard/steering column or on the kick panel to the left of the driver’s feet. Again, if you have a tough time finding the hood release, check the manual. When you pull the release handle, the hood will pop up, but it will not open completely. That is because there is a secondary latch for safety. Reach under the center of the partially-raised hood panel to locate the secondary latch. Disengage the latch and open the hood all the way. If so equipped, place the hood prop rod in position to hold up the hood (for models without hydraulic hood struts).
2. Locate the dipstick
It is usually found toward the passenger side of the engine (on your left if you are standing in front of the vehicle and looking at the engine). Do not confuse it with the transmission dipstick at the rear of the engine. The oil dipstick often has a circular ring-shaped orange or yellow handle that is easy to see. Unfortunately, some newer vehicles do not feature an oil dipstick anymore. Just as manufacturers have been eliminating transmission fluid dipsticks, they have begun doing so with oil dipsticks. It seems that people prefer to allow technology to do simple tasks, like checking the oil. But, for the reasons mentioned earlier, that can become problematic. Electronic oil level sensors can do the same job as the dipstick, and yet, they can fail, leaving a higher margin of error for your engine. Check the manual if your car does not have an oil dipstick.
3. Remove the dipstick
Grabbing the handle of the dipstick, pull it up and out. The dipstick is a long strip of metal that reaches deep into the bottom of your engine where the oil is stored. Once you have pulled the dipstick out of the engine entirely, clean it with the cloth so that there is no oil residue left. Reinsert the dipstick all the way into the engine.
4. Remove the dipstick again
Pull the dipstick out once again so that you can “read” what it is revealing. Take care not to point the bottom end of the dipstick upwards, otherwise, you could get a false reading. Keep it with the bottom end facing generally downward. Now, look at the end of the dipstick. You will notice marks that show the level of the oil. You might see a “full” mark and a “low” mark. Instead, you might find a small hole near the end of the dipstick for the low mark and another hole a little higher up for the high mark. On another model, you might see a textured area that represents the range between high and low. Regardless of the design of the scale, the top mark represents the “full” level of oil, and the bottom mark represents when the engine has lost oil – usually about a pint low. What you want to see is that the oil is either at the top mark or in between the two marks, somewhere in that zone. If the oil does not reach the lower mark – or if no oil appears on the dipstick at all – it is essential that you add oil. You might also want to have your oil changed if it is substantially low since oil breaks down and degrades faster at lower capacities.
5. Replace the dipstick
Once you are done checking the oil level, return the dipstick to its place and make sure it is firmly inserted all the way. Carefully close the hood and make sure it has latched properly.
A couple of other things you might notice when you are checking the oil, besides its level, are the smell and color of the oil.
Some auto owners worry about their engine oil appearing dark black in color. Most of the time, this is not a problem, since soot (a normal byproduct of combustion) gets in the oil and stains it black. But soot is not a problem in your oil if it is changed on time. On the other hand, if it is dark and discolored and you have skipped oil changes, the discoloration could be due to some other contamination and thermal breakdown.
Likewise, if your oil is dirty and you see or feel grit or tiny flakes of metal, those are problematic; your oil should be changed. And if you smell gasoline or a sweet syrup odor on the dipstick (or the oil appears milky), you should take your car to a mechanic as soon as possible, as those are signs of more severe engine problems.
Columbia Auto Care & Car Wash | Author: Mike Ales | Copyright
This article is intended only as a general guidance document and relying on its material is at your sole risk. By using this general guidance document, you agree to defend, indemnify and hold harmless Columbia Auto Care & Car Wash and its affiliates from and against any and all claims, damages, costs and expenses, including attorneys’ fees, arising from or related to your use of this guidance document. To the extent fully permissible under applicable law, Columbia Auto Care & Car Wash makes no representations or warranties of any kind, express or implied, as to the information, content, or materials included in this document. This reservation of rights is intended to be only as broad and inclusive as is permitted by the laws of your State of residence.